Unleash the magic of indoor gardening with your very own Unicorn Planter! Unicorns bring a playful and whimsical quality that enhanced with color and sparkle! Whether Unicorns are your spirit animal, or you simply need some magic in your day, take a break and have some fun making your Unicorn Planter for succulents.
STEP 1 – GATHER SUPPLIES:
For your Unicorn creation, you will need the following items:
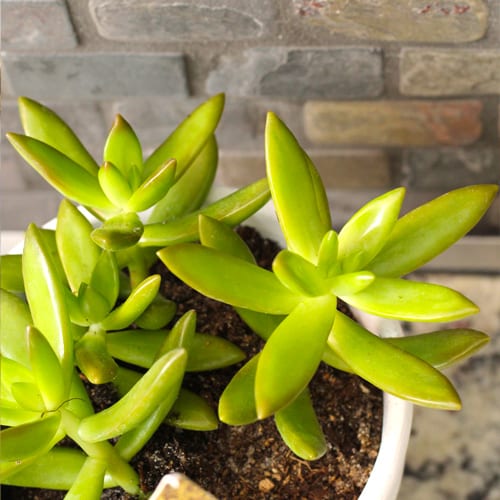
- Succulents
- Ceramic Pottery
- Pebbles or Stones
- Calloway’s Premium Potting Soil
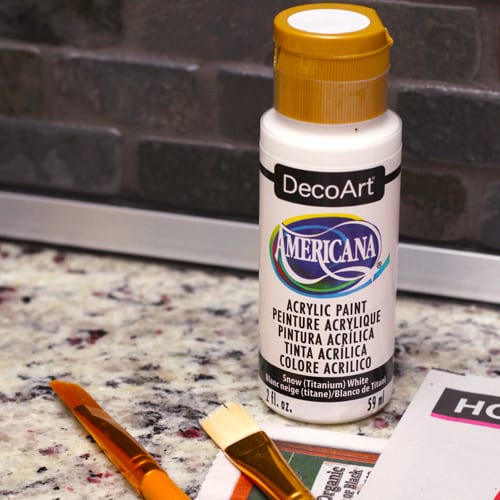
- White matte Acrylic paint for ceramics
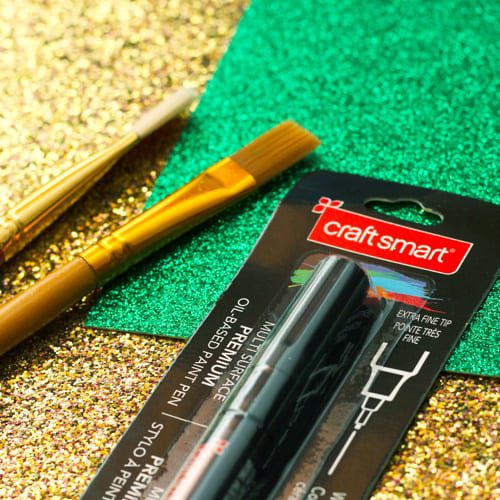
- Black paint pen for ceramics
- Small fabric or paper flowers
- Glitter cardstock paper in gold and green
- Paint brush or sponge
- Scissors
- Hot glue
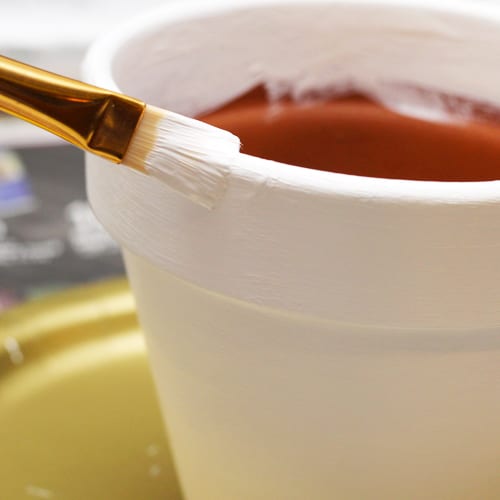
STEP 2 – PAINT YOUR CONTAINER:
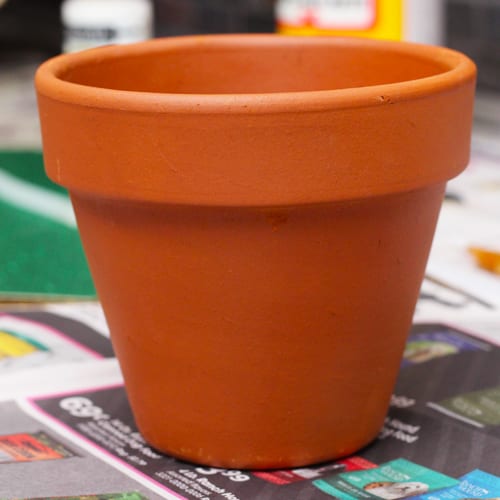
First, you will need to paint your container white. Use a good matte acrylic that is made for ceramics.
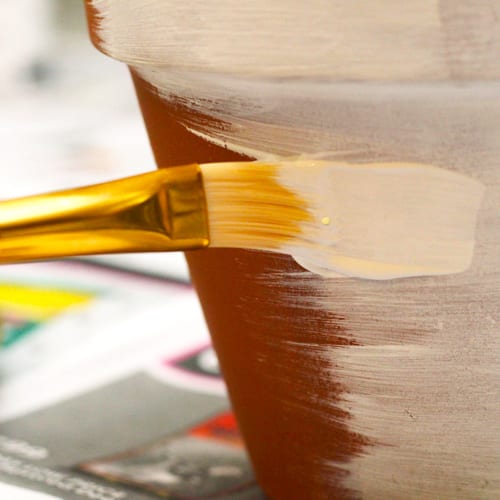
You will likely need a few coats to ensure the container is properly covered and your paint is smooth.
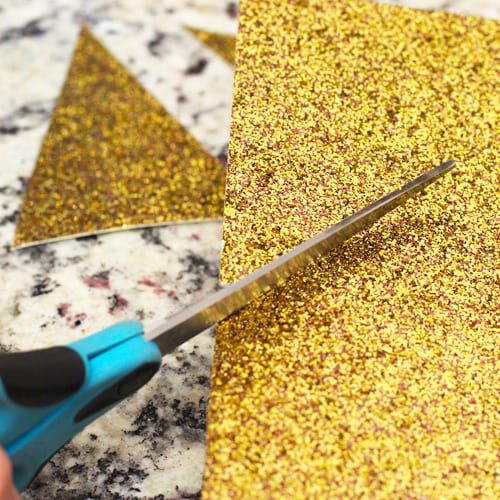
STEP 3 – CUT OUT HORN AND LEAVES:

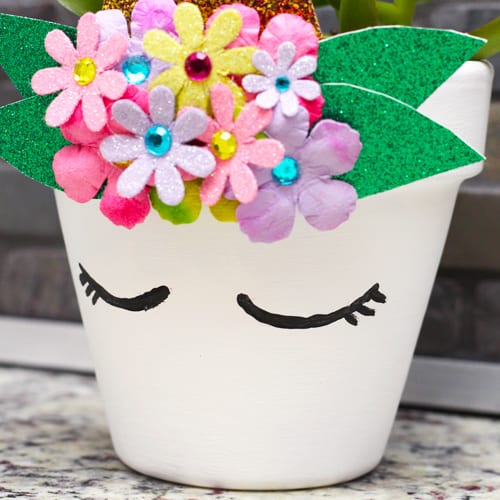
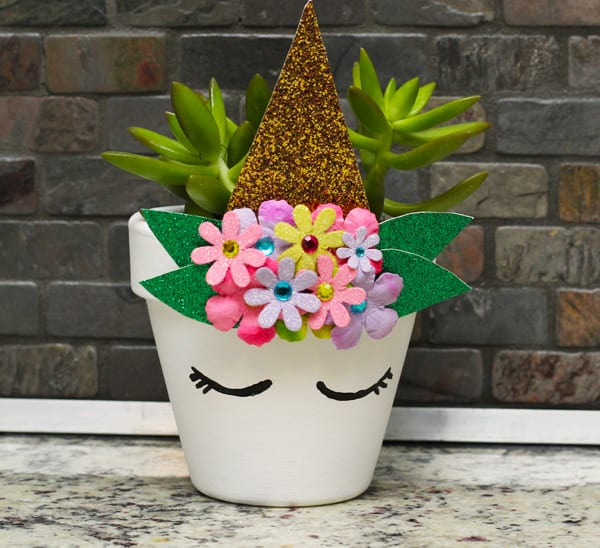
While your container is drying from being painted, get your gold glitter cardstock. Cut out a triangle for the Unicorn’s horn. Make sure the shape is large enough to be proportional to the size of the container you are using. Don’t worry, you will have plenty of leftover cardstock to make a couple to see which horn fits the best.
Next, get your green glitter cardstock. Outline a simple leaf shape on the non-glitter side of the paper and cut it out. Use this shape as a stencil for the other 3 leaves. Cut out the remaining leaves. We will use these to anchor the paper flowers in the next steps.
STEP 4 – HOT GLUE:
When your container is dry, it is time to start gluing. Remember to always have an adult help with this part if you are making this craft with kiddos.
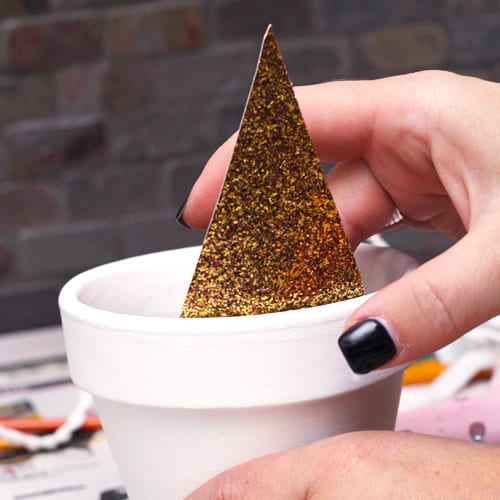
Get your gold glitter horn. Place it on the inside of the top of the container and glue it on. Hold it in place for a second to make sure it is secure.
Next, glue on the green glitter leaves, gluing 2 that slightly overlap on each side of the horn.

Once these are in place, it is time to add the paper flowers. Glue the flowers however you see fit! We added a variety of sizes that are overlapping with different colors.
STEP 5 – ADD THE UNICORN FACE:
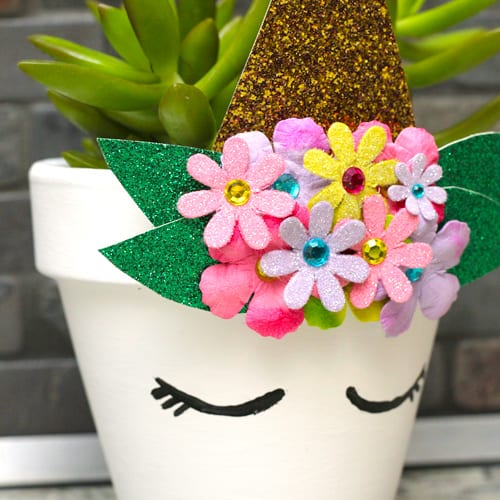
To complete your Unicorn, it needs a friendly face. Get your black paint pen and draw on 2 eyes. Draw 2 wide “U” shapes and add eyelashes.
STEP 6 – PLANT YOUR SUCCULENTS:
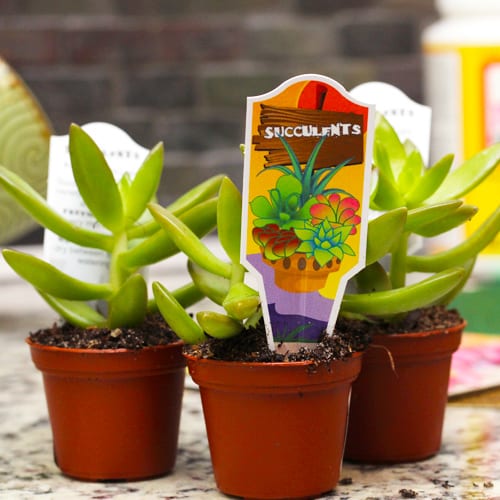
Place some stones or large pebbles on the bottom of the container to help the soil drain properly. Then, add your Calloway’s Premium Potting Soil, leaving room for your plants.
Add your succulents and add water until it drains through the container. Add more soil if needed.
To care for your succulents, water again when the soil feels dry to the touch. For more information about caring for your succulents, check out our blog!
STEP 7 – ENJOY THE MAGIC:
Your adorably whimsical Unicorn is now complete! Give it as a gift, display it in your home, or brighten up your office. Make sure your creation gets adequate sunlight so your succulents stay happy and healthy.
Stop by our store nearest you for your Succulent selections, available in many shapes, sizes, colors, and styles! Don’t forget to pick up your container and soil while you are there!

Graphic Designer and Social Media Manager with 7+ years of experience creating impactful visuals and strategic digital content. Skilled in branding, content creation, and growing online engagement.